Centos安装配置Nginx
主要有两种方法
使用
nginx-proxy-manager手动安装
使用
nginxwebUI
方式一:使用nginx-proxy-manager
1、安装
version: '3'
services:
  npm:
    container_name: nginx-proxy-manager
    image: 'chishin/nginx-proxy-manager-zh:2.9.18'
    restart: unless-stopped
    volumes:
      - ./data:/data
      - ./letsencrypt:/etc/letsencrypt
network_mode: "host"默认用户名:admin@example.com
默认密码:changme
默认端口:81(云服务器防火墙要放开)
2、配置
2.1、代理配置
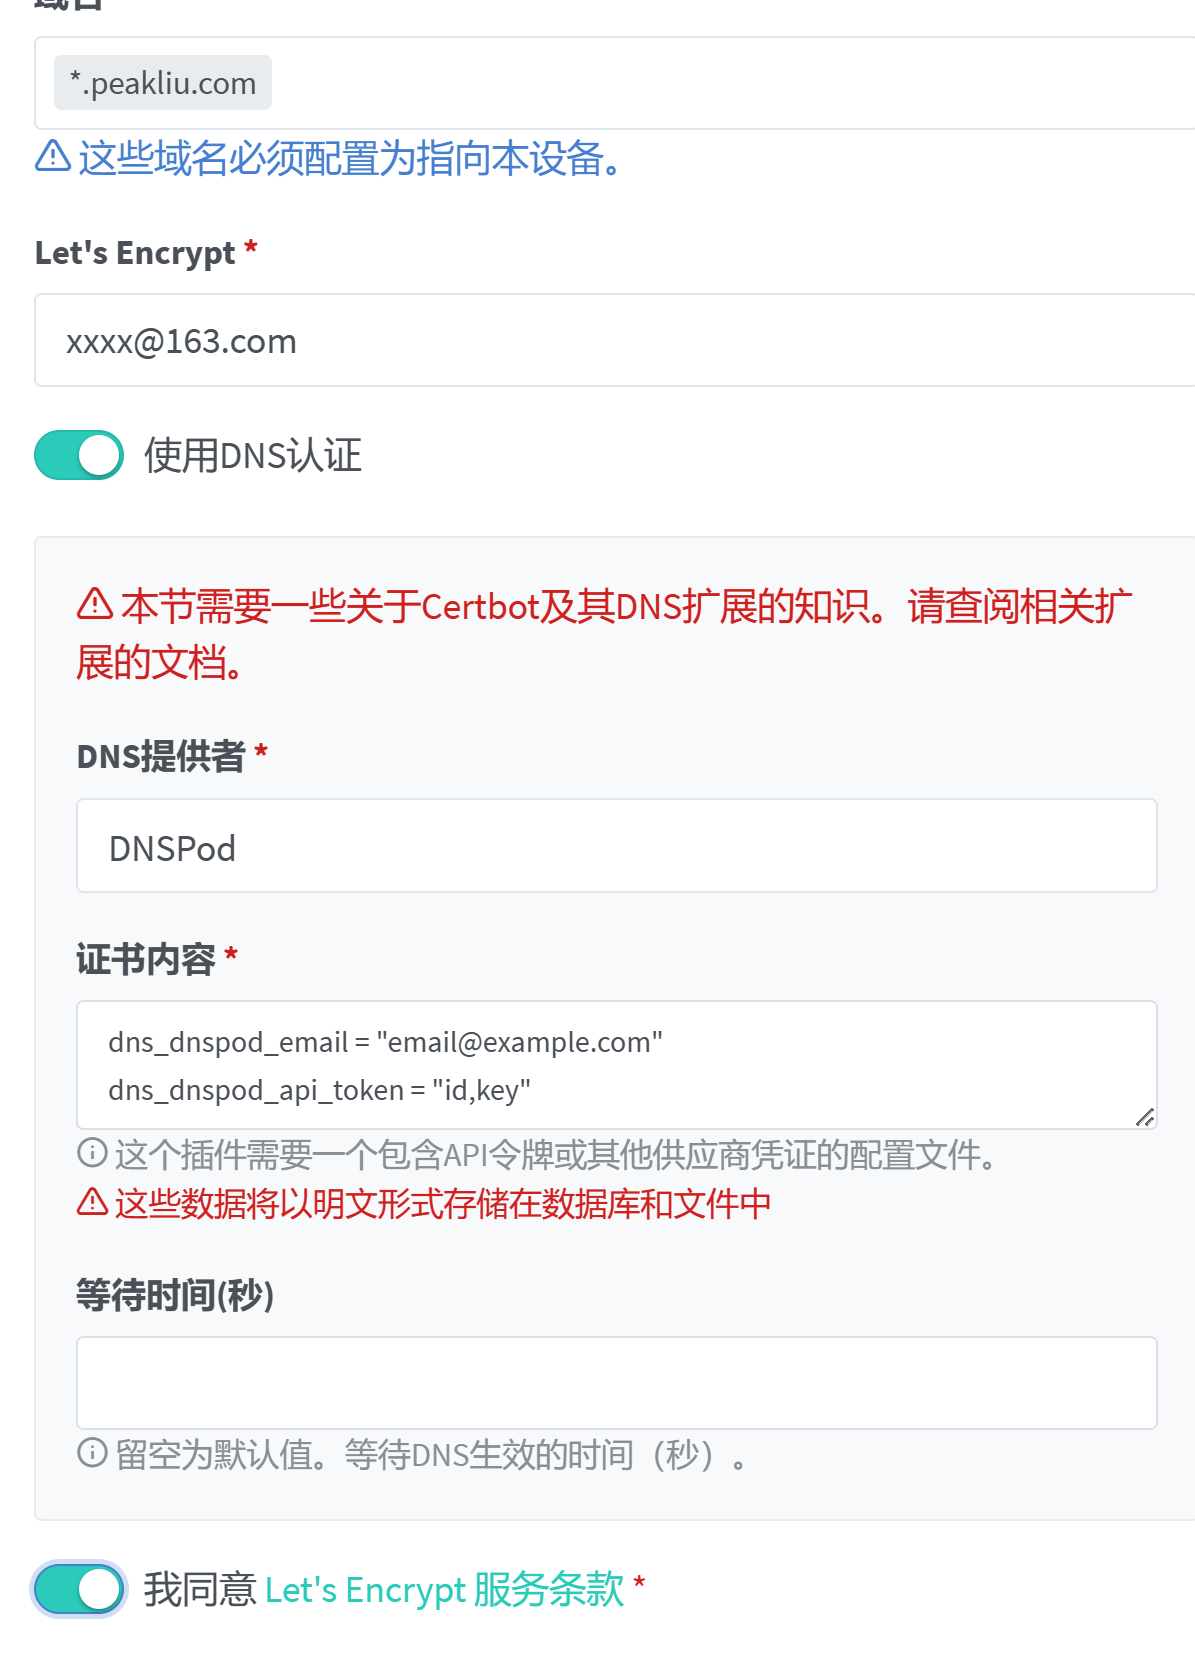
 2.2、ssl申请
可以申请通配域名(这里以腾讯云为例)
 id和key的申请链接 https://console.dnspod.cn/account/token/token
方式二:手动安装
1、安装nginx
sudo yum install nginx
# 启动并设置自启动
sudo systemctl enable nginx
systemctl start nginx
# [注意]如果不能装
sudo yum install epel-release
sudo yum check-update
sudo yum install nginx
2、安装certbot
参见 https://certbot.eff.org/lets-encrypt/centosrhel7-nginx
sudo yum install certbot
# 配置自动renew
sudo crontab -e
# 输入如下内容
30 2 * * 1 /usr/bin/certbot renew
00 3 * * 1 /usr/sbin/nginx -s reload
# 查看刚才创建的定时任务
sudo crontab -l
可能碰到的问题
# ImportError: No module named 'requests.packages.urllib3'
sudo pip uninstall requests
sudo pip uninstall urllib3
sudo yum remove python-urllib3
sudo yum remove python-requests
sudo yum install python-urllib3
sudo yum install python-requests
sudo yum install certbot
3、申请证书
#创建申请脚本
sudo touch new_ssl_cert.sh

#填入以下内容,保存退出
#!/bin/bash
certbot certonly --webroot -w /usr/share/nginx/html/ -d $1

#使用脚本申请
sudo sh ./new_ssl_cert.sh example.peakliu.com
4、nginx配置文件示例
server.conf
# 根据实际域名修改server_name
server {
    server_name example.peakliu.com;
    listen 80;
    include /etc/nginx/certbot.conf;

# 根据实际服务情况配置转发
#    location / {
#        proxy_pass http://127.0.0.1:3090/;
#        proxy_redirect off;
#        proxy_set_header X-Real-IP $remote_addr;
#        proxy_set_header Host $http_host;
#    }


# 开启https时 添加重定向 同时移除上述服务配置
    location / {
        return 301 https://$http_host$request_uri;
    }
}
server-ssl.conf
server {
    server_name example.peakliu.com;
    listen 443 ssl;
    client_max_body_size 100M;

    ssl_certificate /etc/letsencrypt/live/example.peakliu.com/fullchain.pem;
    ssl_certificate_key /etc/letsencrypt/live/example.peakliu.com/privkey.pem;
    ssl_trusted_certificate /etc/letsencrypt/live/example.peakliu.com/chain.pem;

    ssl_protocols TLSv1.2;
    ssl_prefer_server_ciphers on;
    ssl_session_cache shared:SSL:10m;
    ssl_session_timeout 5m;

# 根据实际服务情况配置转发
#    location / {
#        proxy_pass http://127.0.0.1:3090/;
#        proxy_redirect off;
#        proxy_set_header X-Real-IP $remote_addr;
#        proxy_set_header Host $http_host;
#    }
}
certbot.conf
location ^~ /.well-known/acme-challenge/ {
   default_type "text/plain";
   root     /usr/share/nginx/html;
}

location = /.well-known/acme-challenge/ {
   return 404;
}
5、配置nginx
# 添加nginx配置软链接
sudo ln -s /绝对路径/server.conf /etc/nginx/conf.d/server.conf
sudo ln -s /绝对路径/certbot.conf /etc/nginx/certbot.conf

# reload使配置生效
sudo nginx -s reload

# 申请ssl证书
sudo certbot certonly --webroot -w /usr/share/nginx/html/ -d example.peakliu.com

# 添加ssl配置软链接
sudo ln -s server-ssl.conf /etc/nginx/conf.d/example-ssl.conf

# reload使配置生效
sudo nginx -s reload
6.错误解决
1.日志报 Permission denied
主要是selinux原因,可以临时关闭也可以永久关闭
bind() to 0.0.0.0:880 failed (13: Permission denied)临时关闭selinux
# 设置SELinux 成为permissive模式
setenforce 0

# 设置SELinux 成为enforcing模式
setenforce 1
永久关闭selinux
# 修改selinux配置文件
vim /etc/selinux/config

# 将SELINUX=enforcing改为SELINUX=disabled
SELINUX=disabled
# 重启机器即可补充说明:使用acme.sh申请ssl证书
中文说明:acmesh-official/acme.sh Wiki (github.com)
国内环境安装:https://github.com/acmesh-official/acme.sh/wiki/Install-in-China
dns验证模式注意api:acmesh-official/acme.sh Wiki (github.com)
也可以参考:acme配置 DNS方式 https证书访问
