
官方资料
官网: http://seata.io/
官方文档: http://seata.io/zh-cn/docs/overview/what-is-seata.html
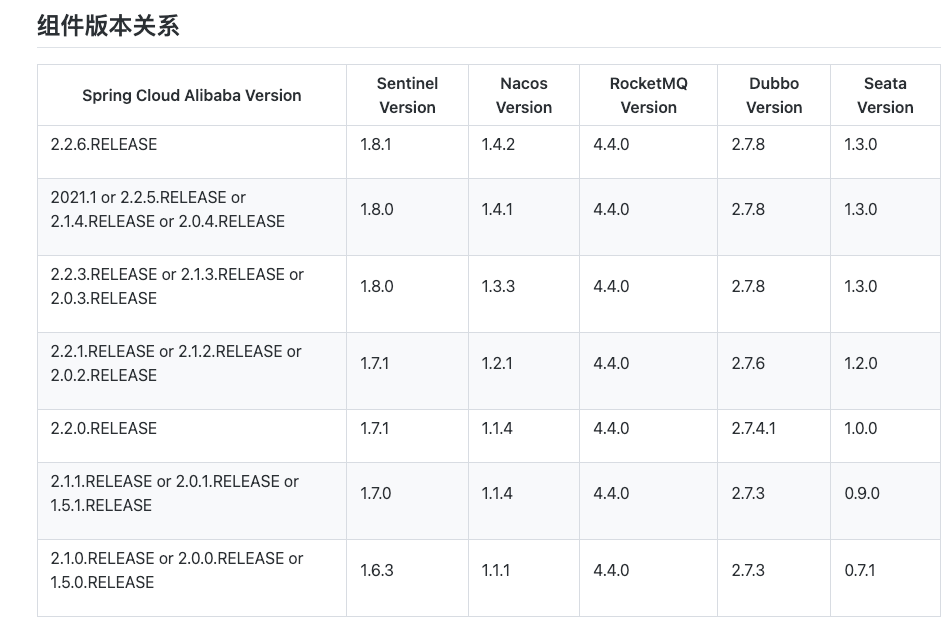
安装(演示版本1.3.0)
1. 下载安装包
下载所需版本的安装包,下载链接,并解压
2. 下载脚本
seata安装包中未包含所需的安装文件,所以需要下载额外脚本文件,下载链接,目录结构如下,选择对应版本的分支
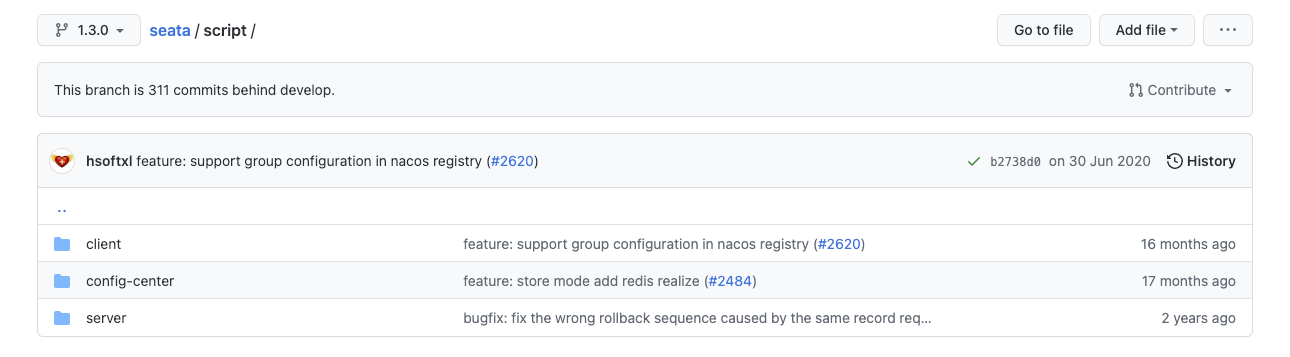
client端: 包含所需的DB文件
config-center配置中心: 配置中心所需的文件
server服务端: 客户端所需文件
3. 设置配置中心配置
- 创建数据库
seata,创建脚本在刚才下载的脚本script->server->db->mysql.sql,导入即可 - 修改配置,找到
script->config-center文件夹,打开config.txt文件,将里面的内容全部删除,使用下面的配置
service.vgroupMapping.my_test_tx_group=default
store.mode=db
store.db.datasource=druid
store.db.dbType=mysql
store.db.driverClassName=com.mysql.jdbc.Driver
store.db.url=jdbc:mysql://127.0.0.1:3306/seata?useUnicode=true
store.db.user=root
store.db.password=123456
store.db.minConn=5
store.db.maxConn=30
store.db.globalTable=global_table
store.db.branchTable=branch_table
store.db.queryLimit=100
store.db.lockTable=lock_table
store.db.maxWait=5000
3.将配置信息注册进nacos,运行script->config-center->nacos-config.sh脚本
nacos-config.sh -h localhost -p 8848 -g SEATA_GROUP -t 5a3c7d6c-f497-4d68-a71a-2e5e3340b3ca -u username -w password
参数说明:
-h: host, the default value is localhost.
-p: port, the default value is 8848.
-g: Configure grouping, the default value is 'SEATA_GROUP'.
-t: Tenant information, corresponding to the namespace ID field of Nacos, the default value is ''.
-u: username, nacos 1.2.0+ on permission control, the default value is ''.
-w: password, nacos 1.2.0+ on permission control, the default value is ''.
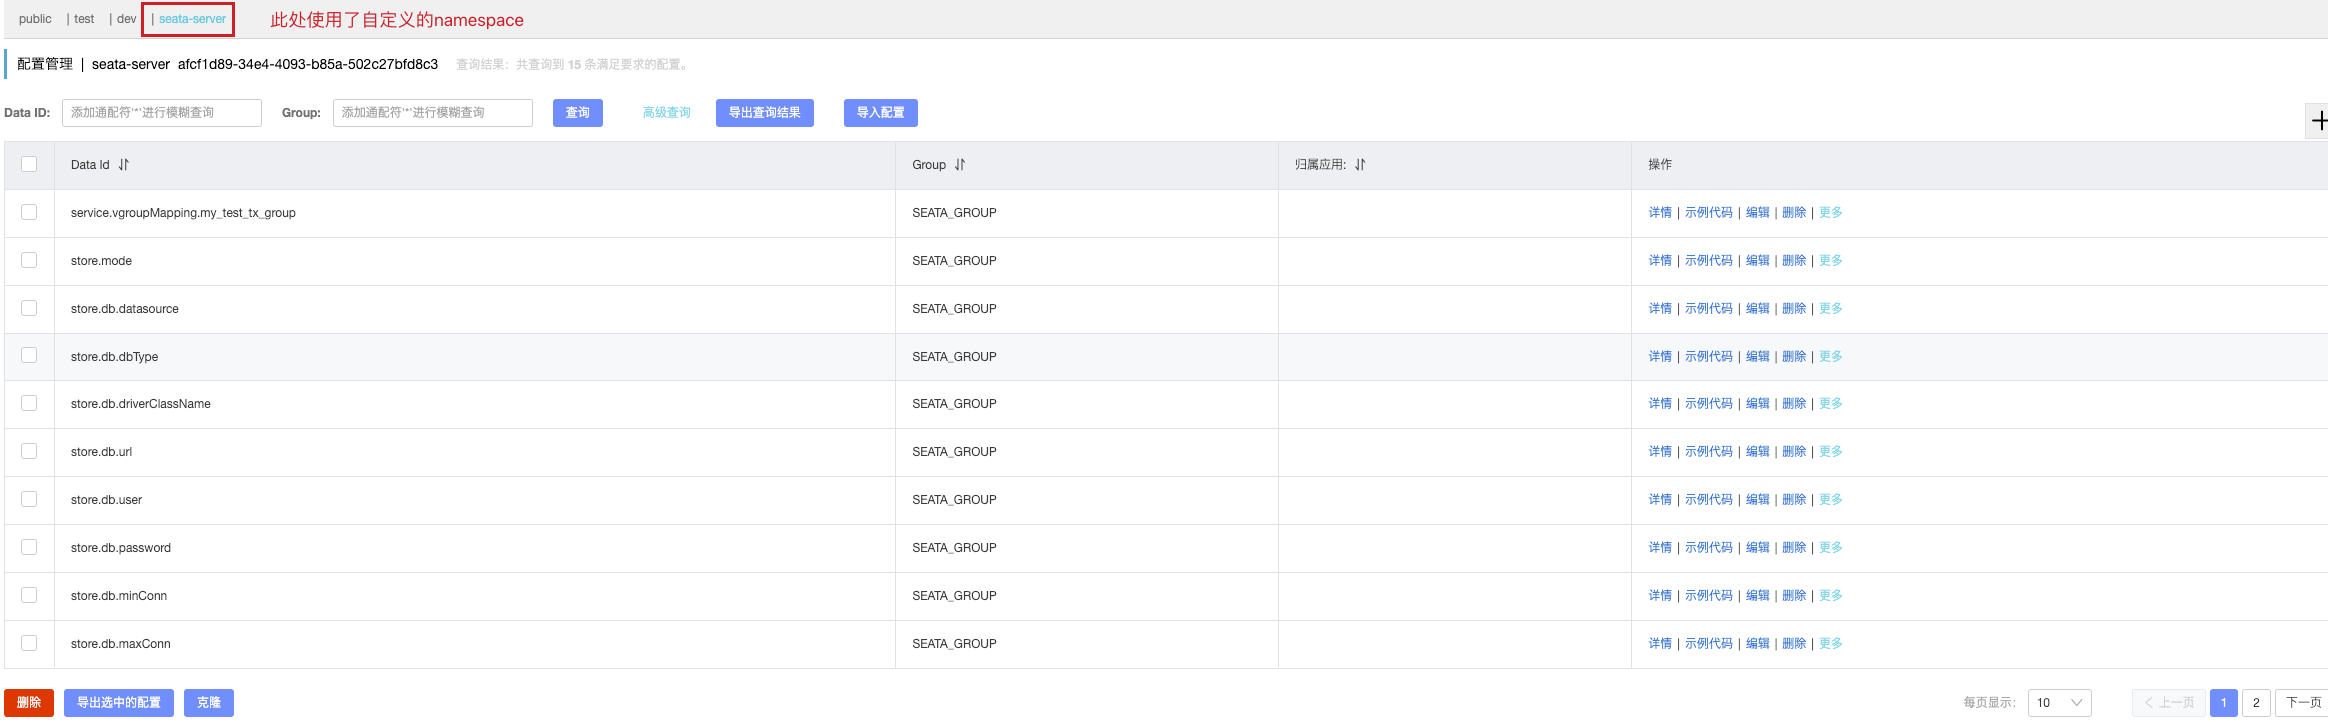
执行之后,nacos控制台可以看到如下配置,了解nacos配置参考另一篇博客
4. 修改seata配置
打开seata的conf目录,编辑registry.conf文件registry.type改为nacos,config.type改为nacos,最终效果如下,已删除无用配置
registry {
  # file 、nacos 、eureka、redis、zk、consul、etcd3、sofa
  type = "nacos"

  nacos {
    application = "seata-server"
    serverAddr = "127.0.0.1:8848"
    group = "SEATA_GROUP"
    namespace = "afcf1d89-34e4-4093-b85a-502c27bfd8c3"
    cluster = "default"
    username = "nacos"
    password = "nacos"
  }
}

config {
  # file、nacos 、apollo、zk、consul、etcd3
  type = "nacos"

  nacos {
    serverAddr = "127.0.0.1:8848"
    namespace = "afcf1d89-34e4-4093-b85a-502c27bfd8c3"
    group = "SEATA_GROUP"
    username = "nacos"
    password = "nacos"
  }
}
5. 启动seata
执行命令
#win环境,使用powershell运行
.\seata-server.bat -m db -n 1

#Linux环境
sh seata-server.sh -m db -n 1
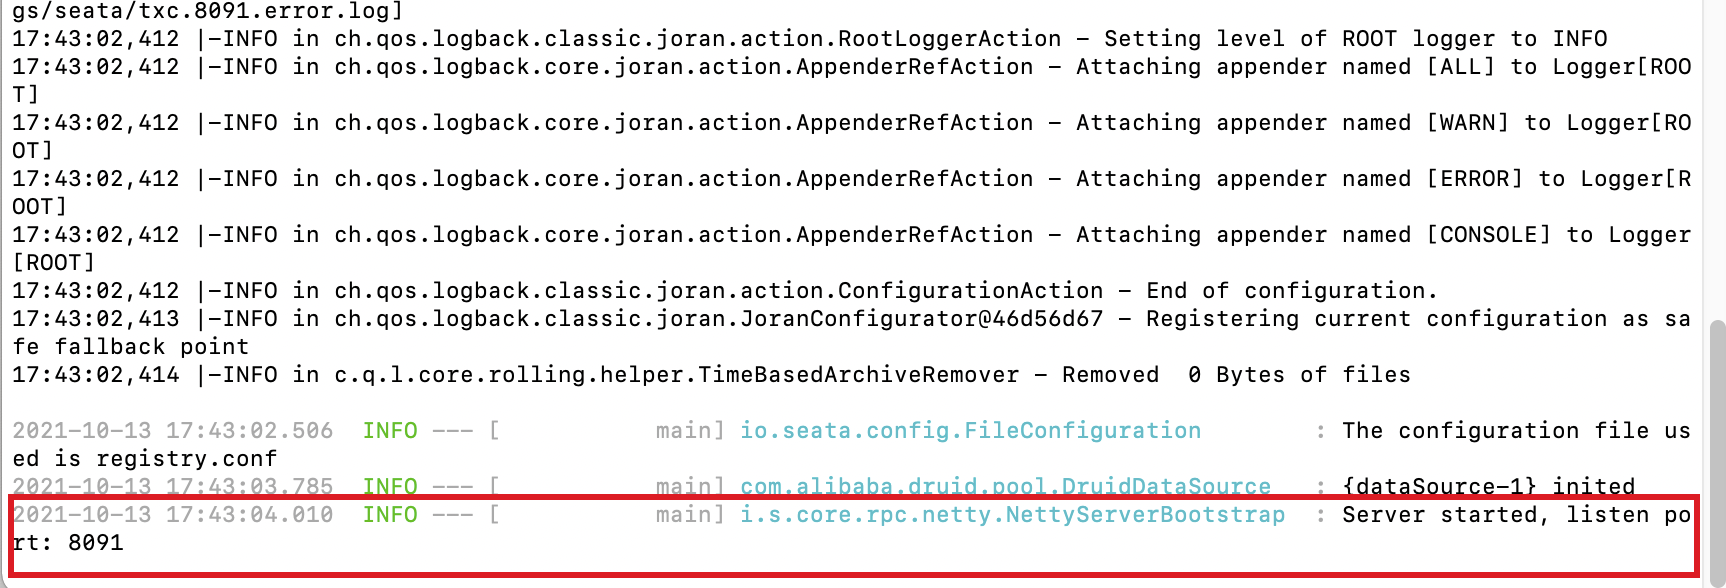
出现如下信息,说明启动成功
如何使用
1. 修改业务数据库
业务项目数据库中,添加一张undo_log的表,sql脚本位于script->client->at->db的mysql.sql脚本
2. 项目配置
pom坐标
        <dependency>
            <groupId>com.alibaba.cloud</groupId>
            <artifactId>spring-cloud-starter-alibaba-seata</artifactId>
            <exclusions>
                <exclusion>
                    <groupId>io.seata</groupId>
                    <artifactId>seata-spring-boot-starter</artifactId>
                </exclusion>
            </exclusions>
        </dependency>
        <dependency>
            <groupId>io.seata</groupId>
            <artifactId>seata-spring-boot-starter</artifactId>
            <version>1.3.0</version>
        </dependency>
在项目application.yml配置文件中加入如下配置即可
seata:
  enabled: true
  application-id: seata-order-service
  tx-service-group: my_test_tx_group
  enable-auto-data-source-proxy: true
  config:
    type: nacos
    nacos:
      #可以使用自定义的命名空间
      namespace: "afcf1d89-34e4-4093-b85a-502c27bfd8c3"
      serverAddr: 127.0.0.1:8848
      group: SEATA_GROUP
      username: "nacos"
      password: "nacos"
  registry:
    type: nacos
    nacos:
      application: seata-server
      server-addr: 127.0.0.1:8848
      group: SEATA_GROUP
      #可以使用自定义的命名空间
      namespace: "afcf1d89-34e4-4093-b85a-502c27bfd8c3"
      username: "nacos"
      password: "nacos"